Showing posts with label AMC Matador Restore. Show all posts

Thursday, February 7, 2013

Color on the Car!

I'll keep this short and sweet, life is busily blessed at the moment...

I painted color on my car today! I promise in depth pics and progress once I get this all finished, but couldn't resist showing you a pic of what I got done today. All the inners of the doors, decklid, hood, and door jams were painted this morning.

Looks good, dontcha think? :)

Saturday, February 25, 2012

Matador Restoration update; The Doors

Alright, this will be a long update as far as posts go.

All four doors on the matador had damage in one way or another. The two doors on the left side (Driver's side) had been repainted with a spray can. The two doors on the right had damage from a sideswipe or something...

I had to sand through five layers of paint, primer, clear, original paint, original primer on the driver's side, then I got to some bondo...

When you come across old bondo on a car such as this it is important to make sure that the old stuff isn't going to crack under the new bondo that will be applied. I did this by sanding a little deeper to make sure it was mixed properly all the way through. It was, so when I got to the bodywork on the car, I didn't have to remove the old stuff. (thankfully)

Here is the right side stripped of paint...

I could go in depth on the repair of each door, but figured that would get a little boring. So, I'm going to focus on the door in the worst condition. This door was the rear passenger.

When you have a dent as severe as the one in the passenger door, I wouldn't want to fill it with bondo first thing. Doing so would not only be more expensive, but also heighten the possibility of the bondo cracking. Which would be bad.
Instead, I needed to pull the door dent out, so less bondo would be used.
And wouldn't ya know it? there is a tool and system made just for this purpose. ;)

The way pulling a dent out is pretty simple, a welding gun is needed, and a pull bar. The way it works is you weld little copper pieces to the dent...


Just like so, then I took a pull bar and banged the weight away from the door.


This pulled the metal out so less bondo was needed. Less Bondo is always a good thing.

So after the door was sufficiently pulled out, I cut the copper pieces off...

Then ground the stubs off...

Now we are ready for bondo. When using bondo, it is important to make sure it is mixed well so it hardens evenly. Applying it to these doors was difficult as well, because I had to make a "line" that had previously been smashed...

Here is what the door looked like after 2 layers of bondo. See how the line is forming? That's a good thing. :)

This pic is right before the final layer of putty coat. Putty coat is softer than bondo and accepts primer better than the bondo. 

After I applied the putty coat and sanded that down, it was time to prime. :)
Bad pic I know...

Looks pretty sharp doesn't it? It still has a ways to go before it is ready for paint. The next step in the process is "Blocking". Blocking takes wet sandpaper and evens the primer so the surface has no pitting, tiny dents, etc. It took me about an hour to block on door, and I had do to it 4-5 times per door, as they were in such bad condition...

So here is the blocking process.
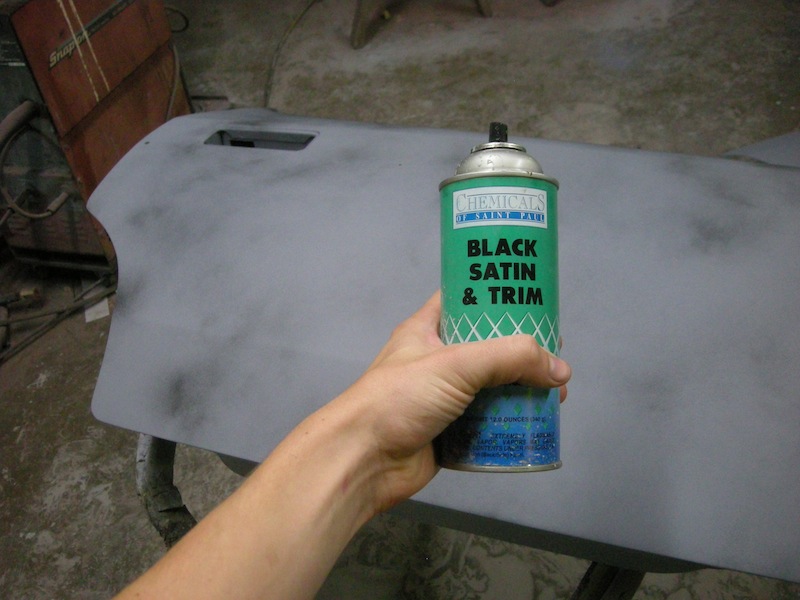
Black Spray paint on the door. I did this so I could see where there were low and high spots.

The block and 400grit sandpaper.

Added water to the door for the wet sanding. I also had a bucket I kept my sandpaper in... The more water, the better.

Here is a before and after pic.

That's pretty much it for the doors. All four doors took me about... 6 weeks I think. It was a long process. They look very good now.

Not sure what I will be posting next, maybe fenders?

Stay tuned!

Monday, December 12, 2011

Matador Restoration; The Decklid

In case you are wondering, a decklid is the "hood" for the trunk. I have no idea why that is the term, but neither do I understand why a pair of wire cutters are called "dikes"....

Anyway, let's get to the pics. :)


Here it is, in incredible condition on top, with some rust on the seams underneath...


Now it is stripped... Took me about an hour to do the top, and another hour to do the bottom if I remember correctly.


This is a pic of the underside after it has been primed and blocked.

 Top Primed. :)
 Blocking process...

A better close up of what the primer has to look like to be acceptable for paint. The far right is... the far left is yet to get there.

So, pretty simple once you get the hang of it and get the process down... It took me three half days to finish the decklid....

Next up...
The doors. All four of the banged up, beaten in, and rust free doors. ;)

Austin


Tuesday, December 6, 2011

Matador Restoration; The Hood

One of the very first parts I started working on this restoration was the hood and the decklid. This post will cover the hood, and the next will cover the decklid.

After I got the hood off the car, I placed it on two padded sawhorses like so;

There was very little damage to the hood for it being 40 years old. The clear-coat had faded and some of the paint underneath had started "spiderwebbing". 

I took a "DA" to the hood with 180 grit sandpaper. A DA is a air powered rotary sander about 6 inches in diameter. It makes dust. In our case... white dust. 
This is what the hood looked like after going over the entire hood with the DA. I didn't have to strip all the paint because most of it was still good.

DAing the top of the hood took me about 2 hours if I remember correctly. Time to flip it over...


The bottom of the hood was a lot worse than the top. There was surface rust, oil splatter, dirt, and the old fiberglass insulation (which had mold on the inside of it). 

4 hours later.... once the dirt, oil, and rust was removed... it didn't look that bad. :)

Yup, that's the same hood. After it is primed. ;)

I flipped the hood back over, and primed the top too.

Now, the next part of the paint prep process is the most difficult and time consuming. This step is called "Blocking". Blocking consists of take 400 grit wet sandpaper, a sanding block, and going over the primer until it is smooth to the fingers. 

Usually it take 2-3 coats of primer and sanding to get the surface just right and ready for paint. 

The left side is all done, and the right has yet to be sanded. It is blackish because I sprayed some guide-coat on the primer to detect an micro spots.

So, as of now, the hood is done and leaning against the wall ready for paint.

That's it for the hood. :)

Wednesday, November 30, 2011

The 1971 AMC Matador. The story of my first car...

We all remember our first car. It might have been a rust bucket. it may have been reliable yet plain, or some may have gotten financial support  (parents) and purchased a nice car.

But you know what? We all loved em, no matter what they were like. 

I bought my first car back in June of 2009. I always wanted an older car, so I could fix it up and learn how cars work. Never would I imagine what I was getting myself into buying this car...


So what is it?

It is a 1971 AMC Matador Sedan.

Why in the world would I buy something like this?

I thought it was pretty sweet looking, and honestly, it sounded like a podracer.  It rode smooth, handled well, the entire family could fit into it, and I had an apartment in the trunk if I needed a place to stay for the night. ;)

So, I paid paid $1500 cash for the car, after negotiating from the $2100 asking price. I drove it around for about 9 months. A couple things happened to the car in those 9 months...

1. The wheel fell off. Not kidding. I was at an intersection, and turned right... then *CLUNK*.
Mom "I think your... did it... AUSTIN your Wheel Fell off!!!"
Me; "no It didn't!"
*sccccrrrrraaaaaaaaaaaaaape*
Mom "there it goes down the street! STOP!"

So I pulled over and sure enough.... there was my wheel rolling down the street. I apologized to mom, and we had to have it towed....
That's what the fender looked like after the front end fell on it. :(

2. At my best friends house I was going to drive home and the car decided not to start... After taking the starter off and putting it back on... we finally got it to start to drive home. Still don't know why it wouldn't start to begin with...

3. Replaced the exhaust with a custom dual exhaust and got the front end repaired... cost me a bunch of $$$... but that's when I found Mr. Tony and the place I would restore this beast of a car.

So, after I talked to Mr. Tony about working at his shop with the intention of me restoring the car. He said it would be fine. And so I started working for him in the fall 2009.

In March of 2010... I pulled it in to begin the restoration process. I had no idea I would still be working on it a year and a half later.

So....
The next posts are going to be covering various parts and steps I take to restore my car. They probably won't be in the order I did it, but should give you a glimpse into what goes into the hundreds of hours I have spent on this thing.

Until next time,
Austin